
Elements - System Administrator and User Guide - Hosted
Documents Tab
| End-User Guide > Workspace > Loan Maintenance > Documents Tab |
Elements provides users with the ability to attach any type of document to a record in the workspace. The document can be attached at both the client and loan levels. For example, a document containing a picture of a repossessed vehicle could be added to a vehicle loan or legal documents could be added to a client in bankruptcy.
From the Documents (Docs) tab in the workspace, users can add, edit, view and delete documents.
 |
Access to this tab and the functions contained within are controlled by administrator-defined Security Profiles. |

Documents that have been previously loaded for the client are displayed in this tab and the total number of documents is displayed in brackets on the tab.
To add a new document to the client, ensure that the desired contact and loan is selected in the workspace, if necessary, and navigate to the Documents tab. Select Generic from the Source drop-down and click  .
.
The Document Detail window is displayed.
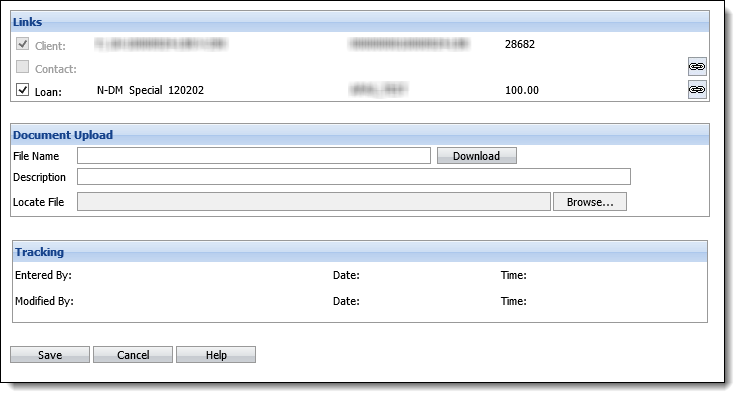
By default, the document is linked to the contact and loan highlighted in the workspace. To remove the links, deselect the Contact and/or Loan check boxes.
Enter a detailed description of the document in the Description field and click Browse to locate the document to link to the client/loan. When the document is located and selected, its file path is displayed in the Locate File field.
When finished, click Save. Click Cancel to disregard adding the document to the client.
Upon clicking Save, the document is added to the Documents tab of the workspace.
To edit an existing document, ensure that the desired contact and loan is selected in the workspace, if necessary, and navigate to the Documents tab. Highlight the desired document and click  . The Document Detail window is displayed.
Make any modifications and click Save. Click Cancel to disregard any changes.
To view an existing document, ensure that the desired contact and loan is selected in the workspace, if necessary, and navigate to the Documents tab. Highlight the desired document and click  .
.
A prompt appears asking to open or save the document. Select Open or Save as desired. The document is opened in its default program (Word, Excel, etc.).
|
Deleting a document does not delete the original document file, it just unlinks the document from the client record in Elements. |
To delete a document, ensure that the desired contact and loan is selected in the workspace, if necessary, and navigate to the Documents tab. Highlight the desired document and click  . The document is deleted.